Close
(0) items
You have no items in your shopping cart.
All Categories
    Filters
    Preferences
    Search

    Sorry - this product is no longer available

    Sand Casting Pattern Skull

    $21.50
    Who doesn't love skull jewelry? This skull is 1 inch tall x .5 inch wide with a curved and hollow back for easy removal from sand. Includes large sprue for easy casting. See extra photos of process and finishing by Craig Dabler.
    SKU: Sand Skull
    Ship to
    *
    *
    Shipping Method
    Name
    Estimated Delivery
    Price
    No shipping options

    Who doesn't love skull jewelry? This skull is 1 inch tall x .5 inch wide with a curved and hollow back for easy removal from sand.

    Includes large sprue for easy casting.

    See extra photos for the process of casting and finishing the skull, by Craig Dabler. His comments about his photos and the process:

    "I showed some of the steps involved to get it to a finished piece as shown in the picture groups. High polish, antiqued black / gray, and an antiqued, lightly sanded design. To create a pendant, I soldered a bail to the top of the skull but later determined that a bail could be formed from the large sprue on the top of the head for those not comfortable with soldering."

    Craig also did an option of setting stones in the eye sockets. The photos of those are included on our site. Here are his comments about this process:

    "I thought it would be cool to show another option for the skull pattern fromKevin Potter. I polished the two eye sockets, drilled out holes through to the back, and tried to show how a person could set gemstones or diamonds into the eye sockets. I set 5mm Swarovski gems (CZ) by using a tiny 45* heart bur and cutting small cuts into each side to fit the stones girdle into. Once the stones are in place, I tried to show two ways to secure. 1) raising a bead with a 52 (or 51) round bottom graver as shown on the left eye and 2) using a beading tool as shown on the right eye. A third way would be to use a hammer hand piece and channel set the stones into place. Next, I cut off the bail, drilled the sides of the head, fit a chain through, and polished the surface after antiquing. (The finished pictures still show the setting beads but a finished piece should disguise the setting better so that it doesn't take away from the beauty of the piece)."
    Customers who bought this item also bought

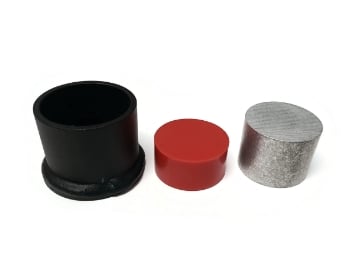
    2 x 2 Contained Urethane with Pusher

    2 x 2 Contained Urethane
    $62.75
    2" x 2" contained urethane with pusher for use with our standard, 2" silhouette dies. Kit includes: container, 95 durometer urethane, metal pusher (silhouette dies sold separately). NOT for use with impression dies.

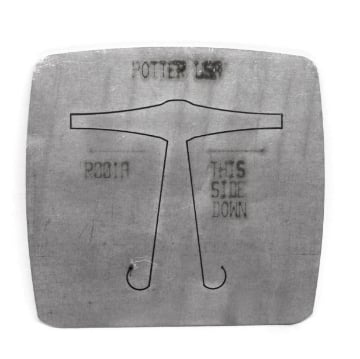
    Pancake Die R001A Ring/Bail 2 3/4"

    PD R001A
    $30.50
    Pancake Die R001A Ring/Bail 2 3/4" Long x 5/8" Widest Point

    Pancake Die Bracelet B002 Square Taper 5 3/4"

    PD B002
    $44.25
    5 3/4" long, and tapered from 3/4" to 1 3/8" wide with squared edge. Use this with our bracelet former to make a bracelet. *** THIS DIE WILL NOT FIT IN A MEDIUM PRESS ***

    Pancake Die R1001.1 Skinny Scallop Ring

    PD R1001.1
    $30.50
    This die measures 3" long X 1/2" wide

    Pancake Die Opener

    PDopener
    $14.00
    Pancake Die Opener